
Decorate your cap this graduation
May 16, 2017
 Imagine it’s graduation day and the last graduate name has been called. You throw your cap in the air in celebration of your accomplishments. You then go to pick up your cap but are confused and don’t know which one is yours because it looks the same as everyone else’s. You now have no idea which cap is yours and will have to live with the fact that the cap you take home may not be the one you wore when you received your diploma. Don’t let this be you on graduation day, and decorate your graduation cap. Cap decorations symbolize celebration, individuality and memories and can be decorated in various ways to reflect one’s personality. If any graduates are stumped on how to personalize their cap I have two DIY ideas courtesy of Pinterest. These caps are both easy and inexpensive to create.
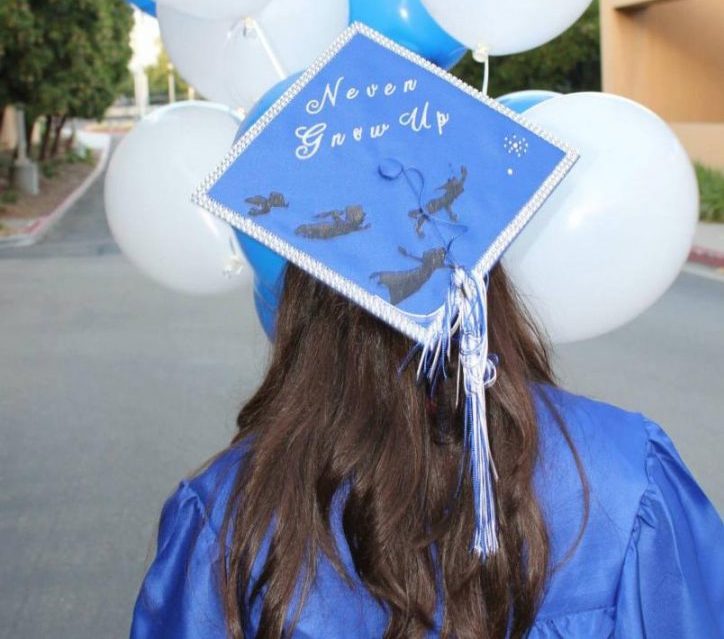
The first cap design is for any Disney lovers out there. It is a Peter Pan inspired cap and it is simplistic yet magical.
You will need:
Fabric glue
Adhesive stick on letters
Adhesive diamond gem stones (two small and one large)
Adhesive gem stone liner
Print out template
Clear glitter nail polish
Begin by searching Google images for “Peter Pan flying silhouette”. Select the image of Peter Pan, Wendy, John and Michael as a black silhouette and print it out. Paint over each silhouette using glitter polish to give the illusion of pixie dust glistening on each character. Position your cap in a diamond position and cut out each silhouette. Using adhesive gem stone strips cut and place them along the edges of the cap to resemble a boarder. Next, glue each character on the cap placing some higher than others to give the illusion that they’re flying. Next spell out “Never Grow Up” using adhesive stick on letters and place them at the top corner of the cap. Finally, use adhesive gemstones to create stars. Place one medium size gemstone about an inch from the Peter Pan silhouette. Next place another medium size gem stone about an inch away from the first. Then use eight small gemstones and place them in an “X” position leaving the medium gem in the center. Add two additional small stones to the top and bottom and one in between each side. This creates the “second star to the right” that the characters are flying to.
The next cap theme is a tribute to those that supported you along your college career, mom and dad.
You will need
Scrapbook paper of your choice
3 inch thick ribbon
Adhesive letters
Fabric glue
Begin by cutting the scrapbook paper to fit the size of your cap. Next cut a small circle in the center large enough so the round tassel holder can pop out. Then use fabric glue to secure the piece of scrapbook paper to the cap. Next take the ribbon and cut two strips equal to the length of your cap. Glue one strip on the top of the cap and the other on the left hand side overlapping the top strip. Now take the ribbon and cut a long enough strip to tie a bow and glue it on the top left hand corner of the cap where each strip of ribbon meets. Next take the stick on letters to spell out “Thanks Mom and Dad” and stick on each of the letters on the top right hand corner. This design resembles a gift and is a way of telling parents thank you for providing you with the gift of an education. You graduating and receiving your diploma is the gift you are giving back to them.
Now when you throw your cap in the air and bid farewell to CSUSM you can do so in a decorative and creative way. There will be no confusion about which cap is yours because you have perfected the art of personalization. Plus decorated caps make it easier for family members to spot you in the large crowd so you can be sure they will capture several pictures of you on your special day.